a small one on one shop ...we take the time to care that you have the right equipment
Use the STAR Online Wax Adviser to find your "wax-of-the-day" for both kick and glide: STAR Ski Wax - Skiman OnlineGlide Waxing
The following steps will get your skis glide waxed for skiing:
- Polish back and forth 15 to 20 times (1 to 2 minutes) with a V2 Omni Prep hand pad (available for $5 from Devils Track Nordic).
- Melt in a soft glide wax and scrape it off while it is warm, but not molten.
- Repeat step 2 - 2 or 3 times, cooling the skis between wax cycles.
- Melt in a hard (cold) glide wax and scrape when cool.
- Repeat the last three steps as many times as it is practical (the more times the better)
- Apply the days correct glider, let cool and scrape.
- Brush with a nylon brush, then with a bronze or bristle brush, and finish polishing with the V2 Omni prep hand pad and your skis are ready for use.
In order to have fast skis and to reduce the risk of burning your ski bases the following procedures should always be followed:
- Iron your skis in one direction. Start at the tip and continue to move along the ski until you get to the tail of the ski.
- You should never see smoke coming from the iron, Smoke means that the wax is burning, and if the wax is burning the base could be melting. If you burn the wax you change the properties of the wax and it will not likely glide as well after being burned.
- Have patience. You must have patience especially when using harder (cold) waxes. It may take more than 3 passes of the iron over the skis just to get the wax to spread uniformly over the ski base.
- Let the iron float on the melted wax. Applying pressure to the iron only increases the chances of burning the base, it does not increase wax penetration into the base.
- After you have ironed a ski three times put it aside and allow it to cool to room temperature. If you are doing more than 1 pair of skis set up a rotation so that you are only ironing any given ski every 10-15 minutes.
- Wax at normal room temperature. If your skis are cold bring them inside and let them warm up to room temperature before starting to wax. In a cool room your wax will solidify faster and you will get less wax penetration into the base.
- Crayon on the first layer from heel of binding plate to 10 to 13" past upper end of ski binding plate on the skis base.
- Heat in the grip wax with an iron and allow it to cool. Cork this "base" layer until smooth.
- Add 3 to 5 more layers of the grip wax for the temperature of the day. Crayon on and cork until smooth. Use more layers if warmer, or fewer if colder. The number of layers also depends on the stiffness of the ski and the snow conditions - soft track vs. hard track and new snow vs. older icy snow.
- Experiment and have fun! Try different combinations (cold over warmer wax if conditions are more humid) or extend the grip zone in new snow, or add more layers in warmer snow.
Testing to Find Your Kick Wax Zone:
- Different snow conditions call for different methods of kick waxing. Finding the kick zone and understanding the your skis versatility for various conditions can aid your racing efforts and help you enjoy recreational skiing because you will know how to wax your skis so they perform optimally in a variety of snow conditions.
- The rear of the kick zone normally ranges from under the middle of the foot back to the heel of the boot. Very seldom does the kick zone extend beyond the rear of the heel. Often a klister kick zone will stop under the mid-foot while a hard wax kick zone will extend back to the rear of the heel. Generally the length of the kick zone, using hard waxes, ranges from 22-25 inches, from the heel. For klister it is slightly shorter, around 18 to 21 inches. These are just initial, though often accurate, guidelines.
- The on snow method is a necessary step toward finding the right kick zone. Since it is easier to add wax while out skiing than remove it, start by waxing your skis only within the shortest kick zone. Holding the skis base to base, grasp your skis on the bindings and give them a squeeze that is hard enough to get them to almost touch in the middle. Sight down the space between the skis and note where the wax pocket appears to be (the space between the skis, where the bases aren’t touching). Start by waxing well within that zone - from the mid-foot forward.
- For this exercise do not sand the kick zone and do not iron in any binder wax. Simply ski on your skis applying wax forward one inche (or 2-3 centimeters) at a time, until you are satisfied with the kick. Ski on them for a time and check the wax periodically for wear. If there is considerable wear then you maybe waxing too long (at least for those conditions). If there is little or no wear continue adding wax, until you reach the wear point. You have trouble getting good grip if the wax pocket is too short.
- These methods are only starting points to find the kick zone. Though these methods are often accurate, snow conditions, technique, experience and other variables make experimenting in a variety of conditions necessary. Have patience and fun playing with your new skis.
Kick waxing - 25 degrees F or -4 to -6 C
- Start by crayoning on a thick layer of a blue kick wax (STAR S6). Iron this layer in and let the ski cool. Add two to three more layers of STAR Blue (S6). Smooth out each layer with the cork and allow to cool between layers. It us best to switch skis between layers.
- Finish by adding 1-2 more layers of STAR Violet (S4). The final layers should be corked out and polished very smooth. Again, allow the ski wax to cool between layers so it will adhere to the base layers better.
- An additional layer approximately 12 inches long (30 cm) can be added from under the mid-foot up under the stiffest part of the ski. Sometimes this is called "the kicker" layer and it is often a warmer wax or additional wax that won't affect the glide properties of the classic ski. It is useful for more secure kick on a stiffer pair of skis when you know you won't get any more drag from the wax pocket.
- Go Ski!
- Start by brushing the ski base with a bronze brush. Glide waxing must be accomplished before you kick wax and the kick zone should cleaned of any glide wax dust. A skating ski is just glide waxed so you don't have to worry about a kick zone.
- Drip on and iron in a warm glide wax (STAR BL01 works well). let cool from its molten state and scrape while still warm. While the base is still warm add another layer of base wax (either STAR Warm BL01 or Cold BL02 base wax). Allow to cool completely, switch skis, wax them, then re-heat the wax on the first pair. This can be done 2-3 times before switching to the final wax layers.
- For the final wax layers the STAR Online Skiman recommends STAR LA4 or LA 6 glide wax. I'd recommend a layer of the LA 4 followed by a layer of the LA 6, especially for skating. You will have to examine the snow conditions to see if the snow is fine and cold or more transformed with rounded snow crystals.
- Experience and trial and error eventually allows you to select the right wax combinations almost all of the time. For skating, it's generally better to go with a colder glide wax and for classical skiing a slightly warmer glide wax works better in the tracks. Again, it's a lot of "feel" for the snow and what your goal for the day is, whether your racing or training. Humidity and prior snow conditions have a large influence too on what wax or combination of waxes to select.
- Iron these final layers in and with these STAR waxes, scrape them while they are still warm so that they peel off. If they chip off reheat the wax a little and peel it off down to the base with a sharp plastic scraper. Remove the wax from the groove and sides of the ski too.
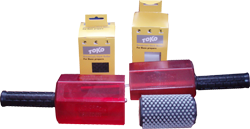
- Final ski preparation is accomplished through brushing the base using rotobrushes or hand brushes. Start with a hard nylon brush first and finish with a softer nylon/horesehair or bristle brush. The ski base should have a shiny appearance to it after rotobrushing. Hand brushing takes more time but you should get the same polished effect like roto brushing. Finish by polishing with the V2 Omni prep pad.
- Go Ski!


